


Are you tired of keeping all the spare buttons from your clothes?
Here is a hack that you can do to make use of your button collection.
Buttons were originally used as ornaments.
Buttons as designs on clothing can be traced back to old Indian civilizations.
Buttons were made out of seashells that were punched with holes so they could be attached to their dress.

Eventually, these small disks were sewn to fasten two pieces of clothing.
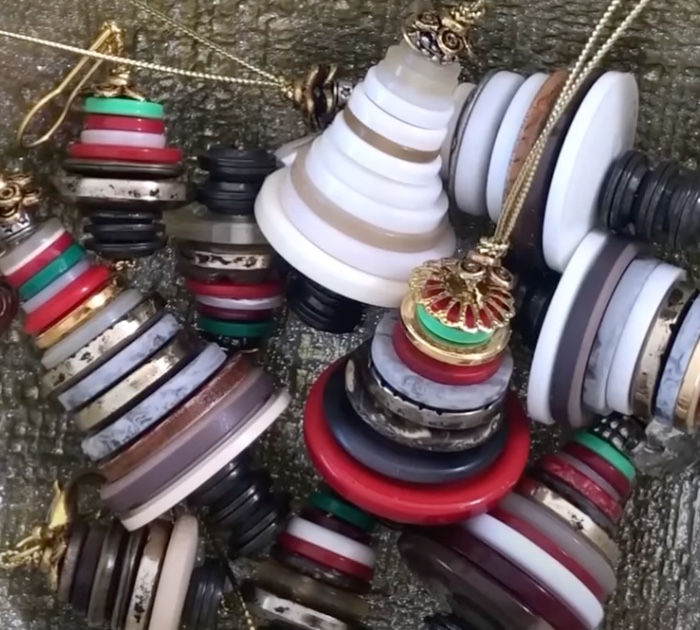
They make great Christmas ornaments, too.
Treasure Books shares how to create a Christmas ornament out of buttons.
Your button collection can be used to make colorful and unique holiday decorations.
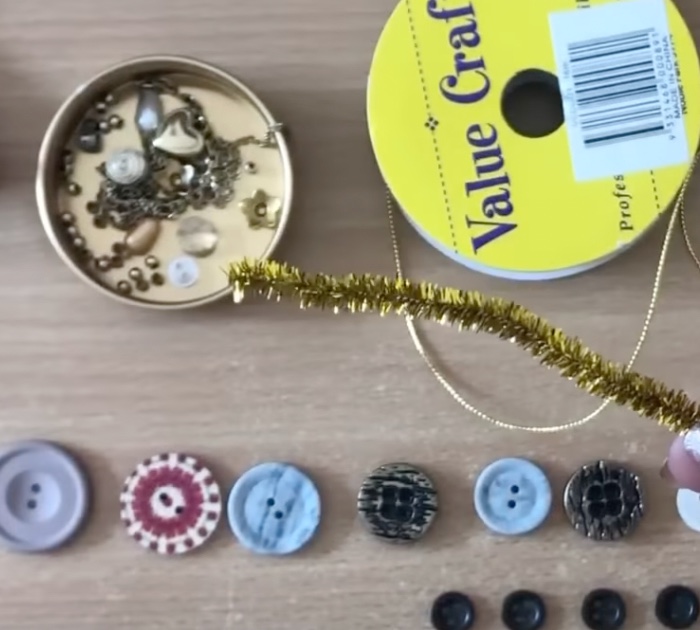
All you need is a set of buttons with various diameters.
Natasha also suggests sorting out your buttons based on colors so it will be easier to pick them out while making this project.
Prepare the materials needed.
You will need the following:
- spare buttons
- strings, wires, or ribbons
- broken jewelry
First, you will need to decide whether you want a tall ornament or a shorter version.
This will dictate how many buttons you need to assemble your preferred creation.
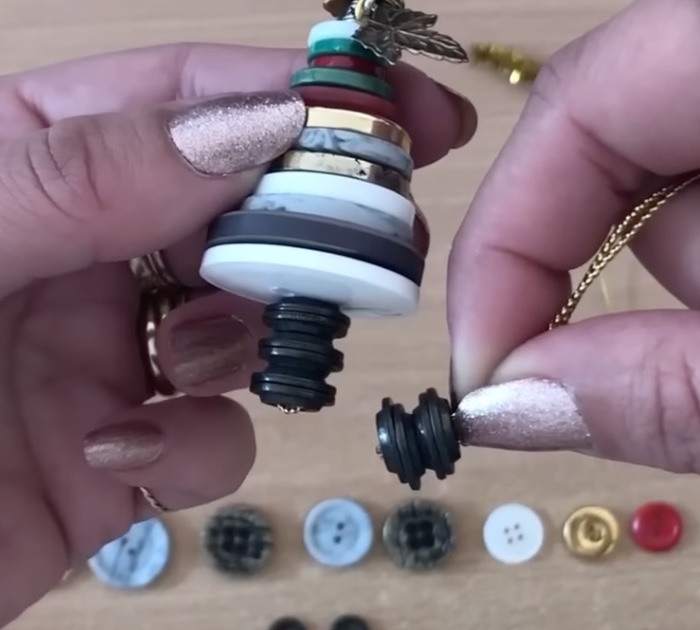
Start with the base of the tree.
Natasha recommends putting the buttons together in a way that they can be sturdy.
Prepare your wire or string by cutting an approximate length of what you will use.
Then, put together both ends and place one end ahead of the other to help you thread the buttons easier.
You can learn more about it by looking at the video.
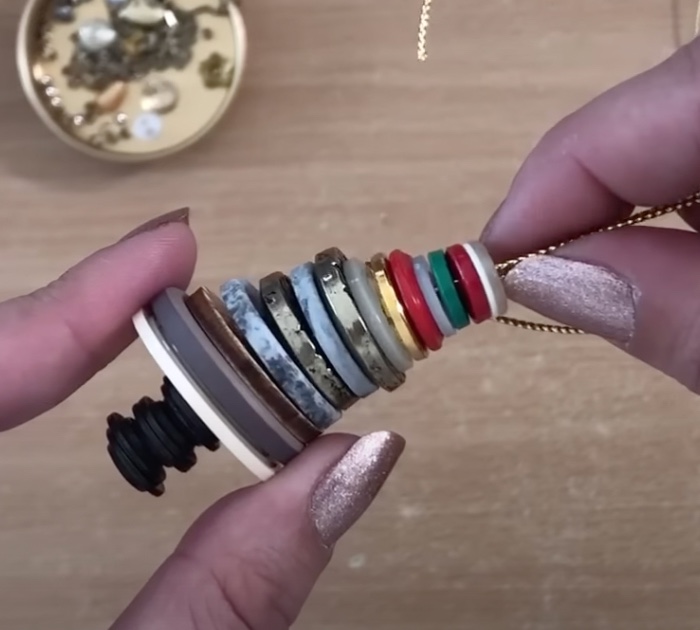
Join all the buttons with string.
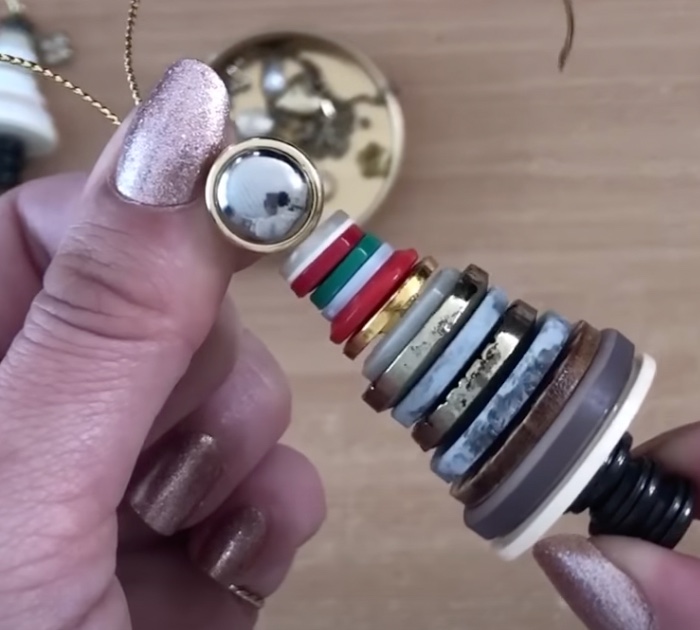
Lay the buttons in decreasing order.
Make sure they have varying widths to make them look like a triangle once pierced.
If the buttons have four holes instead of two, insert the string in a diagonal manner.
Secure a knot on top.
Once you put all the buttons together, tie the ends of the string.
Ensure they are tightly strung to make them look like a Christmas tree.
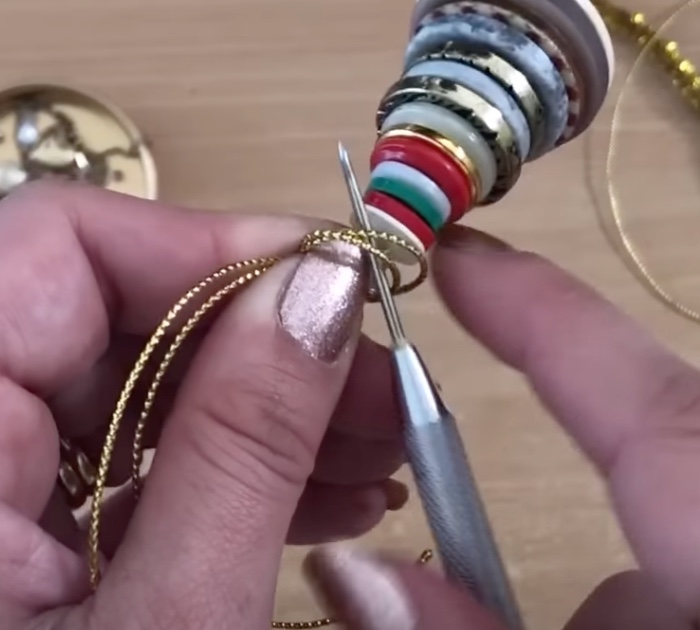
Natasha shows how she does it in the video using a needle-like tool.
Push the knot all the way down to firmly lock it and make it less flimsy.
Add some embellishments.
You may add beads or a shank button after the knot to create a unique look.
You can also try playing around with any available material you have as long as it can be pierced with a string.
After adding all the extra adornments, tie the string to secure them and put another knot on the ends to complete the tree ornament.
You can also make a charm.
The trinket does not need to look like a tree.
You can try a mix and match of different colors or sizes depending on what you want it to look like.

Instead of starting at the base, make a loop where you can put the hook for the charm.
Then continue adding the buttons from the top all the way to the base and secure it again with a knot.
See how adorable these button “trees” turn out in the tutorial video below!
Please SHARE this with your friends and family.

