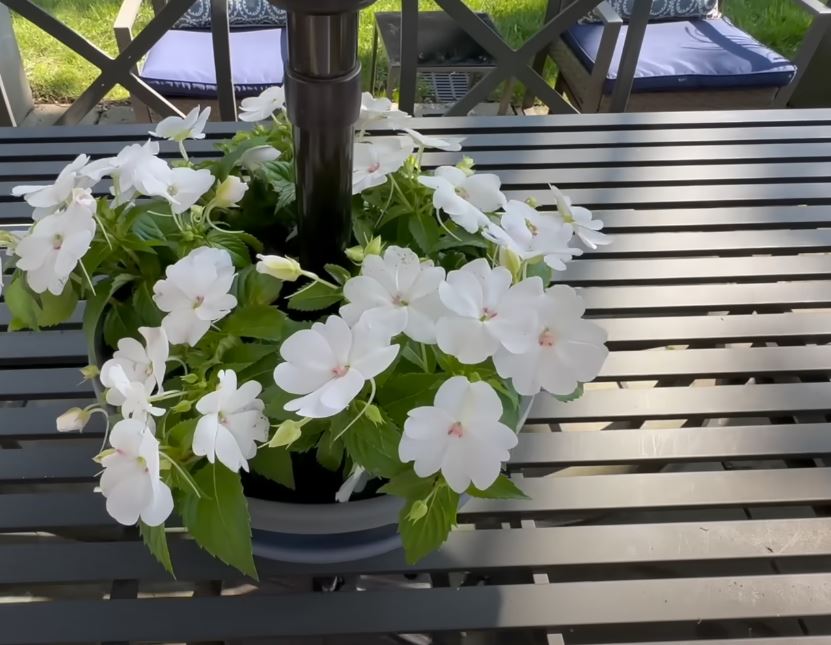
Enhancing your outdoor living space can be both fun and practical, especially when you introduce a versatile centerpiece like a large planter and saucer.
This DIY project is perfect for anyone looking to add functionality and style to their outdoor table setup.
Whether you’re hosting a summer party or just relaxing with family, this easy-to-follow guide will help you create a multi-functional addition to your outdoor space, catering to various needs and occasions.


The first step is selecting the right planter and saucer.
Opt for a wide and low planter, which offers maximum flexibility and usage.
These dimensions are essential as they provide enough space for various functionalities while maintaining a stable and balanced structure.
To make the planter suitable for standard outdoor umbrellas, drill a 2-inch hole in the center of both the planter and the saucer.
This modification ensures that you can easily insert and secure an umbrella, providing shade and comfort during sunny days.


Once you have your planter and saucer ready, it’s time to transform them into a convenient storage solution.
Place the planter over the table’s umbrella opening, using the saucer as a lid.
This setup is perfect for storing summer essentials such as sunscreen, bug spray, and pool toys.
Keeping these items handy ensures that you are always prepared for a day outdoors, without cluttering your table space.


Another great use for the planter is as an ice bucket.
Simply fill the planter with ice to keep your drinks cold during hot days.
The hole drilled earlier allows melted ice to drain neatly, preventing any mess and keeping your drinks accessible.
This practical solution not only helps you stay refreshed but also adds a touch of sophistication to your outdoor gatherings.


The saucer can be flipped and placed on top of the planter to serve as a lazy Susan.
This is particularly useful for holding condiments, napkins, and cutlery, making it easy for everyone to reach what they need during meals.
The rotating feature of a lazy Susan adds a fun and functional element to your table, so your guests’ dining experience is as enjoyable as it is comfortable.


If you prefer to use the planter for its original purpose, it’s easy to incorporate it into your outdoor decor.
Place pots directly inside the planter, and insert the umbrella through the drilled hole.
Add your favorite plants to create a vibrant and colorful display on your table.
This touch of nature on your doorstep will also spice up the looks of your table and garden.


Now, let’s focus on giving your sun umbrella a fresh makeover.
Start by removing the umbrella cover and washing it thoroughly to remove any grease or mold.
It’s important to avoid using fabric conditioner or softener, as these can affect the paint’s adhesion.
Ensuring the surface is clean is crucial for achieving a smooth and long-lasting finish.


For painting the umbrella, use Dixie Bell chalk mineral paint in various pastel colors to add a refreshing touch.
You can apply stripes or spots for a decorative effect, and dampening the surface beforehand helps the paint adhere better.
This creative step allows you to customize your umbrella to match your personal style and the overall theme of your outdoor space.


Finally, apply 303 fabric guard to waterproof the umbrella, protecting it from the elements and extending its lifespan.
Let it dry in the sunshine for the best results.
This final touch not only ensures that your umbrella is ready to withstand outdoor conditions but also adds a polished and professional finish to your DIY project.
With this easy and budget-friendly project, you can transform a simple planter into a multifunctional centerpiece and revitalize your sun umbrella, making your outdoor gatherings more enjoyable and organized.
Check out the all the instructions for the two projects in the video below!
Please SHARE this with your friends and family.


