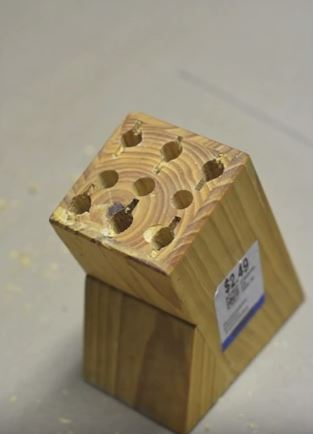
When Selena stopped in the kitchen supply aisle of her local thrift store to pick up a knife block that was missing all the knives, her husband thought she was crazy. He couldn’t figure out what she would use it for and just thought she was bringing home junk.


Still, she bought it and took it home, then got busy.
She had an idea to make something to hold some art supplies. She created something pretty impressive, and it’s easy to do. She shared her idea with other people, so they can make their own.
The description on the video says:
“I had found this old knife block from the thrift store and wanted to make a DIY crayon holder for my kids. This easy DIY craft project takes only about 1 hour, and the only tool you’ll need is a power drill and a few supplies!”


Here’s how to do it.
Supplies:
- Old knife block
- Power drill
- 3/8 drill bit
- Milk paint
- A few metal two-hole straps
- Wood shims
- Screws
- Washi tape
- Small nails
- Small hammer


Directions:
- Step 1: Drill holes in the block. You can use different sizes of drill bits to make the holes different or use one size to make them all the same.
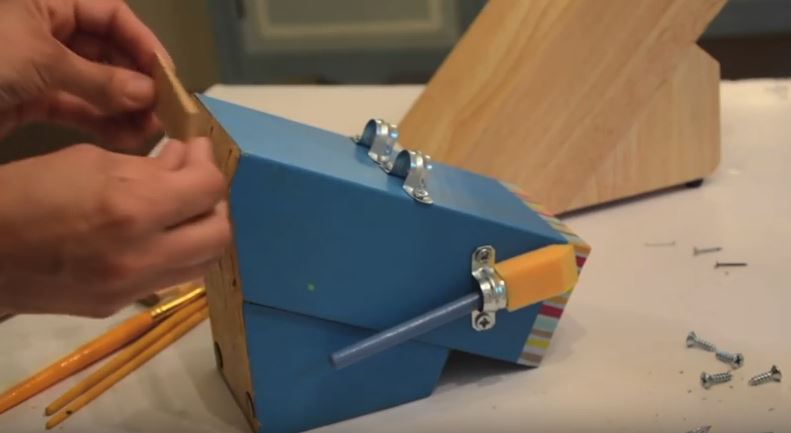
- Step 2: Paint the block as desired. Don’t be scared to get creative and come up with a unique pattern or design for the block.
- Step 3: Hide your mistakes with Washi tape or Modge Podge or just use them the decorate and personalize it. You can use markets and other supplies to help design it, too.
- Step 4: Use the small screws to add the hardware to the block. This will allow it to hold things like scissors and paint brushes. If you plan to use the block to store other things, choose hardware that will secure them.
- Step 5: Add the supplies you want the block to hold. If you are making the block as a gift, you could add them with a nice bow.
Her husband was blown away when he saw the finished product, and other people were shocked at what she created, too.


People loved the video, and it got a lot of positive comments.
Silver Tea Cakes said:
“How clever are you? That’s a super cool idea! Thanks for sharing and happy holidays to you!”
Brenda Byrd said:
“I’m going to make 2 of these. One for my granddaughter and one for me!!! Such a cute and easy idea.”
CandaceT said:
“This is so cute. I think I’ll make a couple for my kids at home and some for my classroom. These would make great gifts for teachers and secretaries too. This was such a great idea.”
Cyrstal Torres said:
“Such a great idea I will give this one a try especially with summer break upon us. Thanks for sharing”


If you are looking for some more ideas to help get your art supplies organized, consider using a back of the door organizer or small baskets.
You can even use old Pringle cans or coffee cans. Gets creative and decorate them to match the other décor in your home.
These things also make great gifts.
You can give them out as party favors, hand them out to students and teachers at the end of the year, and even make them and sell them at your local flea market or craft fair.


The next time you are thrifting and see something that catches your eye, but you really don’t need it, think about all the creative ways you can use it to make your home a little more organized.
You might come up with something as creative at this art supply organizer. Be sure to share your masterpiece with the world, so everyone else can be inspired by it like they were this fun and useful craft.
Please SHARE this with your friends and family.
ARVE Error: Invalid URL https://www.youtube.com/watch?v=Fh-ZpC6vWYE in url


